CLIJ2
GPU accelerated image processing for everyone
3D Image Segmentation
Image segmentation in 3D is challenging for several reasons: In many microscopy imaging techniques, image quality varies in space: For example intensity and/or contrast degrades the deeper you image inside a sample. Furthermore,
To demonstrate the workflow, we’re using cropped and resampled image data from the Broad Bio Image Challenge: Ljosa V, Sokolnicki KL, Carpenter AE (2012). Annotated high-throughput microscopy image sets for validation. Nature Methods 9(7):637 / doi. PMID: 22743765 PMCID: PMC3627348. Available at http://dx.doi.org/10.1038/nmeth.2083
We start by cleaning up ImageJ, opening an example image and configuring an interesting sub-region.
// clean up first
run("Close All");
run("Clear Results");

// open example image stack [available online](https://github.com/clEsperanto/pyclesperanto_prototype/blob/master/demo/segmentation/BBBC032_v1_dataset/BMP4blastocystC3-cropped_resampled_8bit.tif?raw=true)
open("C:/structure/data/BMP4blastocystC3-cropped_resampled_8bit.tif")
Next, we initialize the GPU, push the image to GPU memory and read out its size.
run("CLIJ2 Macro Extensions", "cl_device=");
Ext.CLIJ2_clear();

stack = getTitle();
Ext.CLIJ2_push(stack);

// read out image size
Ext.CLIJ2_getDimensions(stack, width, height, depth);
print("Image size:", width, height, depth );
> Image size: 393 396 86
For convenience, we make a function for visualizing the image in projections from three sides:
function show(image_to_show, is_label_image) {
Ext.CLIJ2_maximumXProjection(image_to_show, max_x_projection);
Ext.CLIJ2_maximumYProjection(image_to_show, max_y_projection);
Ext.CLIJ2_maximumZProjection(image_to_show, max_z_projection);
// show the images, potentially using the glasbey lookup table
Ext.CLIJ2_pull(max_x_projection);
if (is_label_image) {
run("glasbey_on_dark");
}
Ext.CLIJ2_pull(max_y_projection);
if (is_label_image) {
run("glasbey_on_dark");
}
Ext.CLIJ2_pull(max_z_projection);
if (is_label_image) {
run("glasbey_on_dark");
}
}
// show the image
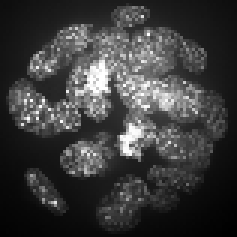
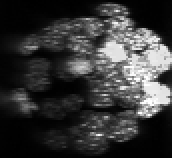
show(stack, false);


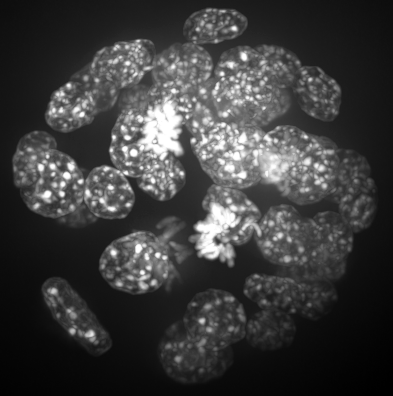
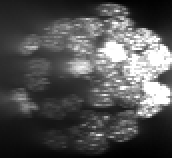
Obviously, voxel size is not isotropic. Thus, we scale the image with the voxel size as scaling factor to get an image stack with isotropic voxels.
// read voxel size from original image using ImageJ functions
selectWindow(stack);
getVoxelSize(voxel_width, voxel_height, voxel_depth, unit);

// create another stack of different size
Ext.CLIJ2_create3D(isotropic_stack, width * voxel_width, height * voxel_height, depth * voxel_depth, bitDepth());

// Scale the image so that it becomes [isotropic](https://en.wikipedia.org/wiki/Isotropy)
Ext.CLIJ2_scale3D(stack, isotropic_stack, voxel_width, voxel_height, voxel_depth, false);

show(isotropic_stack, false);
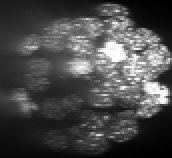
Intensity and background correction
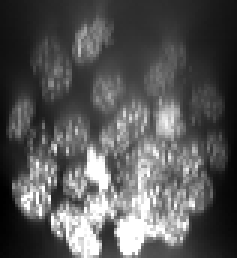
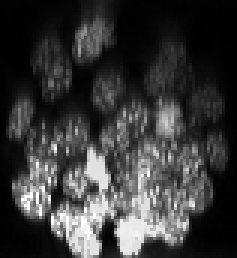
As we can see, intensity is decreasing in Z-direction (from slice to slice) and contrast as well. At least the intensity decay can be corrected.
reference_slice = depth / 2;
Ext.CLIJ2_equalizeMeanIntensitiesOfSlices(isotropic_stack, equalized_intensities_stack , reference_slice);

show (equalized_intensities_stack, false);
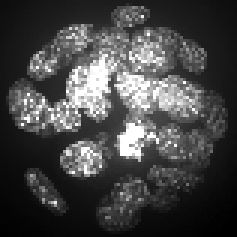
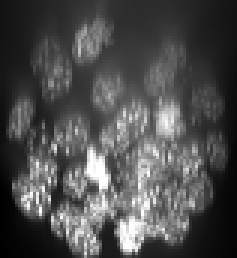
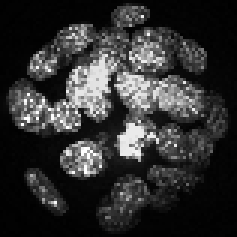
Furthermore, background intensity appears to increase, potentially a result if more scattering deep in the sample. We can compensate for that by using a background subtraction technique:
radius = 5;
Ext.CLIJ2_topHatBox(equalized_intensities_stack, backgrund_subtracted , radius, radius, radius);

show(backgrund_subtracted, false);
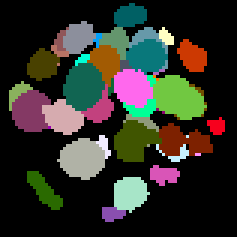
Segmentation
For segmentation, we use a combination of thresholding, spot detection and seeded watershed, called Voronoi-Otsu-Labeling
spot_sigma=3;
outline_sigma=1;
Ext.CLIJx_voronoiOtsuLabeling(backgrund_subtracted, segmented, spot_sigma, outline_sigma);
show(segmented, true);


If you run this macro from ImageJ, the last two opening windows allows to tip and tilt the view by clicking and dragging:
synchronized_views = true;
Ext.CLIJx_show3DWithTipTilt(backgrund_subtracted, "backgrund subtracted", synchronized_views);
run("In [+]");
run("In [+]");
run("In [+]");
Ext.CLIJx_show3DWithTipTilt(segmented, "segmented", synchronized_views);
run("In [+]");
run("In [+]");
run("In [+]");
run("glasbey_on_dark");


In this case, cleaning up by the end would break the tip-tilt-viewer. If you’re not using it, please clean up by the end:
//Ext.CLIJ2_clear();